
Information for supporters
Thank you so much for your support for BeltBolt! We’re really chuffed you’re so enthusiastic. On this page you’ll find information on how to access your supporter benefits, how to create and access custom characters and more.
If you’re in our Discord and haven’t been marked as a supporter, please get in touch! We’re working on payment processors right now which should make this automatic.
Getting your name into BeltBolt
If you have supported BeltBolt to the level of getting your name forever remembered in the user interface, the display name you used to support us will be used and you’ll be automatically included in the next firmware release. If you’d like to change the name that’s used, please let us know.
If your BeltBolt has been updated to a firmware version released at least a week after you supported us to this level, you can find your name in Keyholder Mode under Supporters. Your name will not be published in the published source code of BeltBolt.
Custom characters
If you have supported BeltBolt to the level of getting custom characters, you’re able to commission one locked character and one keyholder character to be included in BeltBolt. If you are artistically inclined, you are welcome to fully design these yourself, or you can ask us to do it for you. All types and species of character are welcome, though we won’t include characters who are under the age of 18.
If we make your pixel art
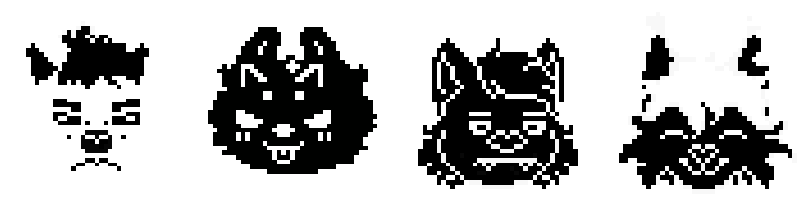
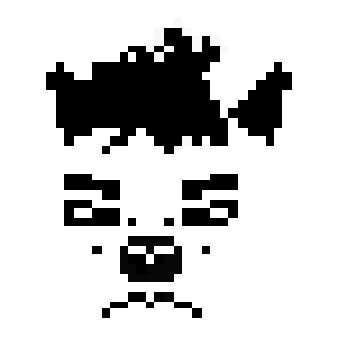
If you would like us to make your characters’ graphics, we’re very happy to! You’ll need to provide us with reference images for which you own the rights to use, and we’ll do the rest! The result will be a set of black and white images for you to review, and video footage of your character in action on BeltBolt. You’re welcome to ask for revisions to perfect your little guys, and we’ll try to do our best. Keep in mind that our beautiful screen displays 1 bit of colour, meaning the available colours are white and black. We’ll be creative, but pixel art inherently comes with limitations, and we may need to minimise some details to make things look good. If you’d like an idea on how big the standard character model is, the tiny image below is just that size – 41px wide by 34px high! We can make the model up to 51px wide and 41px high for more detailed or taller characters.

If you have a character idea but no existing artwork, we’ll do our best to bring it to life. Keep in mind the limitations of pixel art and monochromatic colour.
If we’re making your characters’ artwork, here are some tips:
-
Multiple angles are very useful so we can see how your character looks in 3 dimensions, as we’ll make different heads for when they look left and right.
-
A head-on (looking directly at the “camera”) shot is particularly useful.
-
If your characters have floppy ears or longer fur etc, let us know or show us so we can animate them for bobbing up and down.
-
We’re only going to use your characters’ heads, but seeing how the head connects to the body is useful if there’s fur on the neck etc.
-
A variety of emotions is great. Most useful examples show how your characters’ eyes and mouth open and close, and what their tongue looks like etc.
-
If your characters have any other special attributes that you’d like to include, let us know. If hair, horns or other features should be doing something fancy, we’d like to make that happen.
If you have any questions on whether your characters are suitable etc, get in touch anytime!
If you make your own pixel art
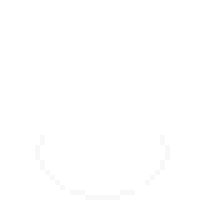
BeltBolt’s screen is a monochrome (single colour) OLED display measuring 256 pixels wide by 64 pixels high. Characters take up a significant portion of this display, and have 48 pixels of height to work with. They also bob up and down by 2 pixels, and should have a gap between the top and bottom of where they sit. Graphics for these characters are small. You’re recommended to use the default size of 41px wide by 34px high, but if you have a complex character or huge ears etc, you can extend this to 51px wide (soft limit, but much wider gets crowded) by 41px high (hard limit for looking good). You can go smaller than these default sizes also (in either or both directions), but much smaller is difficult to get looking good. We’ll code your characters to have the appropriate left/right and up/down offsets to render them in the right place, so every character will look great!
Heads, not tails.
You should make one base set of “heads” that face right. Typically, we use 3 sprites to animate an up-down “bobbing” animation, and render a different sprite for each position. The heads bob up and down by 2 pixels, moving 1 pixel every 100ms. If you’d like your characters to animate in a different way, at a different speed or be static, we can do that too. Your heads can be simply mirrored for facing left, or they can be unique, for example if you’d like hair to sit differently for each direction. Your character heads should fill the whole character dimension size, allowing for “headroom” left by differences between frames. For example, in the example below, each graphic is 41px by 41px, the character dimensions, but the first two heads have 1px of headroom at the top to allow for the ears to go up 1 pixel in the third frame.
-
You do not need to animate the up-down position of the sprites – this is done in software.
-
BeltBolt moves the character up and down according to the character’s settings. Don’t move the main head up and down between frames.

Three head sprites, showing the typical “bobbing” animation, showing the sprite for “down”, “middle” and “up”. Notice how the ears, fur and hair change. The animation attempts to hold the “floppy” bits with inertia, meaning when the sprite as at the lowest point, the ears, fur and hair are highest, and vice versa.
It’s time to face it…
Next, make a set of faces. One bitmap is needed for each emotion possible. Faces are usually not flipped when the character turns around, and instead are offset from the centreline by a certain number of pixels when facing left or right. This amount can be different for each direction. Although it’s usually possible to make non-flipping faces, if you need different versions of faces for left and right directions, please let us know so we can implement it for your character.
When making faces, it is useful to keep the eyes as a reference point, and use a square/rectangle guide for each eye, centred around the vertical midline to keep things consistent. It might be easier for you to draw your faces with a right-facing head, find out the left/right face offsets you need and then send us the files after putting your eyes back to the vertical midline.
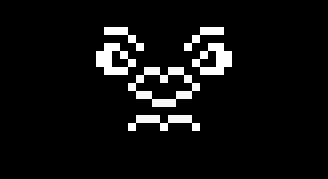
Faces are rendered on top of heads, and should be kept away from the edges of the head to avoid visual clashing. To get the best results, keep a gap of 1 pixel horizontally between your face and head graphics, and a gap of 2 pixels vertically.
In the example on the left, the red lines show the eye guides centred on the character model. The eyes are offset to the right to show what the character looks like when facing right, and the face can move up and down by 2 pixels and left and right by 1 pixel without touching the head graphics.
If your character has overhanging hair or other features which obscure parts of the face, BeltBolt’s engine supports this by “erasing” part of the face after it’s drawn. If you have overhanging features, include a clearly labelled layer or file showing what overhangs. We’ll render its lower outline in black above everything else to selectively erase parts of the face.
Most characters are rendered in white outline with a black body, but it’s possible to have block white characters too, where the face is drawn in black. If you’d like to do this and are supplying individual PNG images, please provide these as white, just like the head.
If you would like to use heavy dithering on your character heads, this may make faces hard to render distinctly. Please stick to block white or block black within the main face area.
Finally, for locked characters only, you’ll need a “zapped” outline graphic that overlaps your character’s “middle” head sprites (left and right versions) for visual separation from background graphics when they’re getting shocked. This will be drawn in black under your character, and we recommend for most characters that it by 2px larger in every direction than your character’s head. This graphic should be solid white. An easy way to achieve this is to select your character head in Photoshop, and use the Select > Modify > Expand option, then fill in any space in the middle that’s left blank.
Testing your characters on real metal
If you own an Arduino or ESP32 microcontroller and compatible OLED display, you can experiment with your characters on actual hardware before sending it. We use a modified version of the U8g2 library for driving our displays, and recommend using image2cpp to generate the binary data for compiling on your microcontroller. The standard version of U8g2 will work for most displays for testing purposes.
Open cheat-sheet for creating your own pixel art
- Your character’s name, description and optionally species/type, preferred pronouns, and 3 pet names.
- Artwork that is plain white and black, scaled to 100% of final size. Pixels should be either 100% or 0% opacity.
- Artwork is preferred supplied as a single Photoshop (.PSD) file, or as a .ZIP archive of PNG images.
- Photoshop layers or individual PNG images should have all pixels as solid white or transparent.
- Character dimensions (recommended 41px wide by 34px high, up to 51px wide by 41px high).
- How many pixels your faces should be offset from the centreline of your artwork when facing right and left.
- If you want your character’s faces to be drawn higher or lower than the head centreline, what that offset is in pixels.
- How far “decorations” (?, !, hearts, spirals etc) should be drawn from the edges of your character model in pixels, horizontally (for both left and right) and vertically.
- How fast your character should “bob”. Default is 100ms per frame (10 frames per second).
- A set of head sprites, by default 6 (3 facing left, 3 facing left, each modified for the bobbing animation).
- If you have hair or other features which overlap the face, a “face blocking” sprite. These are by default static, but can be animated (requires 6 bitmaps).
- For locked characters only: A solid white “zapped” outline graphic that overlaps your character’s “middle” head sprites (left and right versions) for visual separation from background graphics when they’re getting shocked. Recommended oversize: 2px in all directions.
- A set of faces displaying the emotions available:
- For locked characters:
- Smile
- Blinking
- Content (smiling with eyes closed)
- “Suuuure…” (unconvinced)
- Silent / X over mouth
- Nervous laugh
- Winking
- Winking alternative (optional)
- X_X face
- XnX face
- Wow!
- “What???” (Anxious surprise)
- Kissing
- Kissing alternative (optional)
- Exasperated
- Unimpressed
- Teasing (tongue stuck out)
- Drooling
- Crying
- Sleeping
- Tired
- Focused
- 😛
- :3
- Getting zapped
- Angry
- Heart eyes
- Blank (eyes opened only, no other features)
- For keyholder characters:
- Smiling
- Smiling with eyes closed
- Blinking
- Chatty (mid-talking) with mouth closed
- Chatty (mid-talking) with mouth open
- Smirking
- Evil grin
- Innocent
- For locked characters:
Copyright
We need you to have the rights to use your character to include it in BeltBolt. Although it’s unlikely you’ll be able to “drop in” existing artwork to BeltBolt without significant modification, please do not use characters or artwork for which you hold no rights. We won’t implement artwork generated by “artificial intelligence” systems.
If you have a custom character created by us, you maintain copyright over its intellectual property, and BeltBolt will surrender copyright to the pixel art we make to you. If you make your own pixel art ready for us to implement, you of course maintain copyright over it but you will need to provide us with the right to modify and distribute it for inclusion with BeltBolt. We may ask for your permission to use your character for promotion, but will not do this without your consent. If you’re an electronics tinkerer, we can provide you with the source code for your graphics in C++ bitmap format so you can include them in your own projects too!
Submitting your character requests
If you’re ready to request custom characters, please contact us via email or message LockedUpLesbian on Discord with your request. If you’re making your own pixel art, please make sure you compile everything in the cheat-sheet above. If you’re asking us to make the pixel artwork, please include your character’s name, description, all reference artwork you want to provide, and optionally species/type, preferred pronouns, and 3 pet names.
Accessing your custom characters
If you get custom characters made, you will have the option of making your characters public or private. By default, characters will be private, and will require a Supporter Code to unlock and use. When setting up BeltBolt for the first time, or from the Personalisation menu in Keyholder Mode, you can enter this Supporter Code to permanently unlock your characters. You can either keep your Supporter Code private to just you, or share it with anyone you wish to use on their device so they can enjoy your characters too. You can use both your own and someone else’s Supporter Code at the same time to unlock multiple sets of characters.
If you would like your custom character to be public, it will be available to all BeltBolt owners to be delighted by. If you choose to make your character public, this is non-reversible, and we reserve the right to refuse to make characters publicly accessible in certain cases. No custom characters, public or private, will be included in public source code release of BeltBolt’s firmware.
For now, all BeltBolt devices will ship with private custom characters burned into firmware, but inaccessible without these codes. We’re working on a way for custom character owners to use a Micro-SD card to upload their characters to their BeltBolt, for extra protection over their artwork. This Micro-SD card solution will still allow you to share your characters with others, or to publish them online.
Resetting your BeltBolt to factory settings or manually wiping the flash memory will remove stored Supporter Code and you’ll need to go through the unlocking process again.
Questions?
No problem! If you’ve got a query, you can get in touch with us via Discord, BlueSky or email.