
Let’s get you measured up.
It’s important to get your measurements right as our restraints achieve their incredibly low profile by being a fixed size. In general, we can provide a very snug fit, but if you hope to wear your restraints longer-term, we recommend that you go a little looser. If you’re unsure and want to pin them down later, you can order now and provide us with sizes after the fact, so if you’re unsure, get in touch with us for help!
What you’ll need
For getting accurate measurements for your restraints, we recommend getting the following:
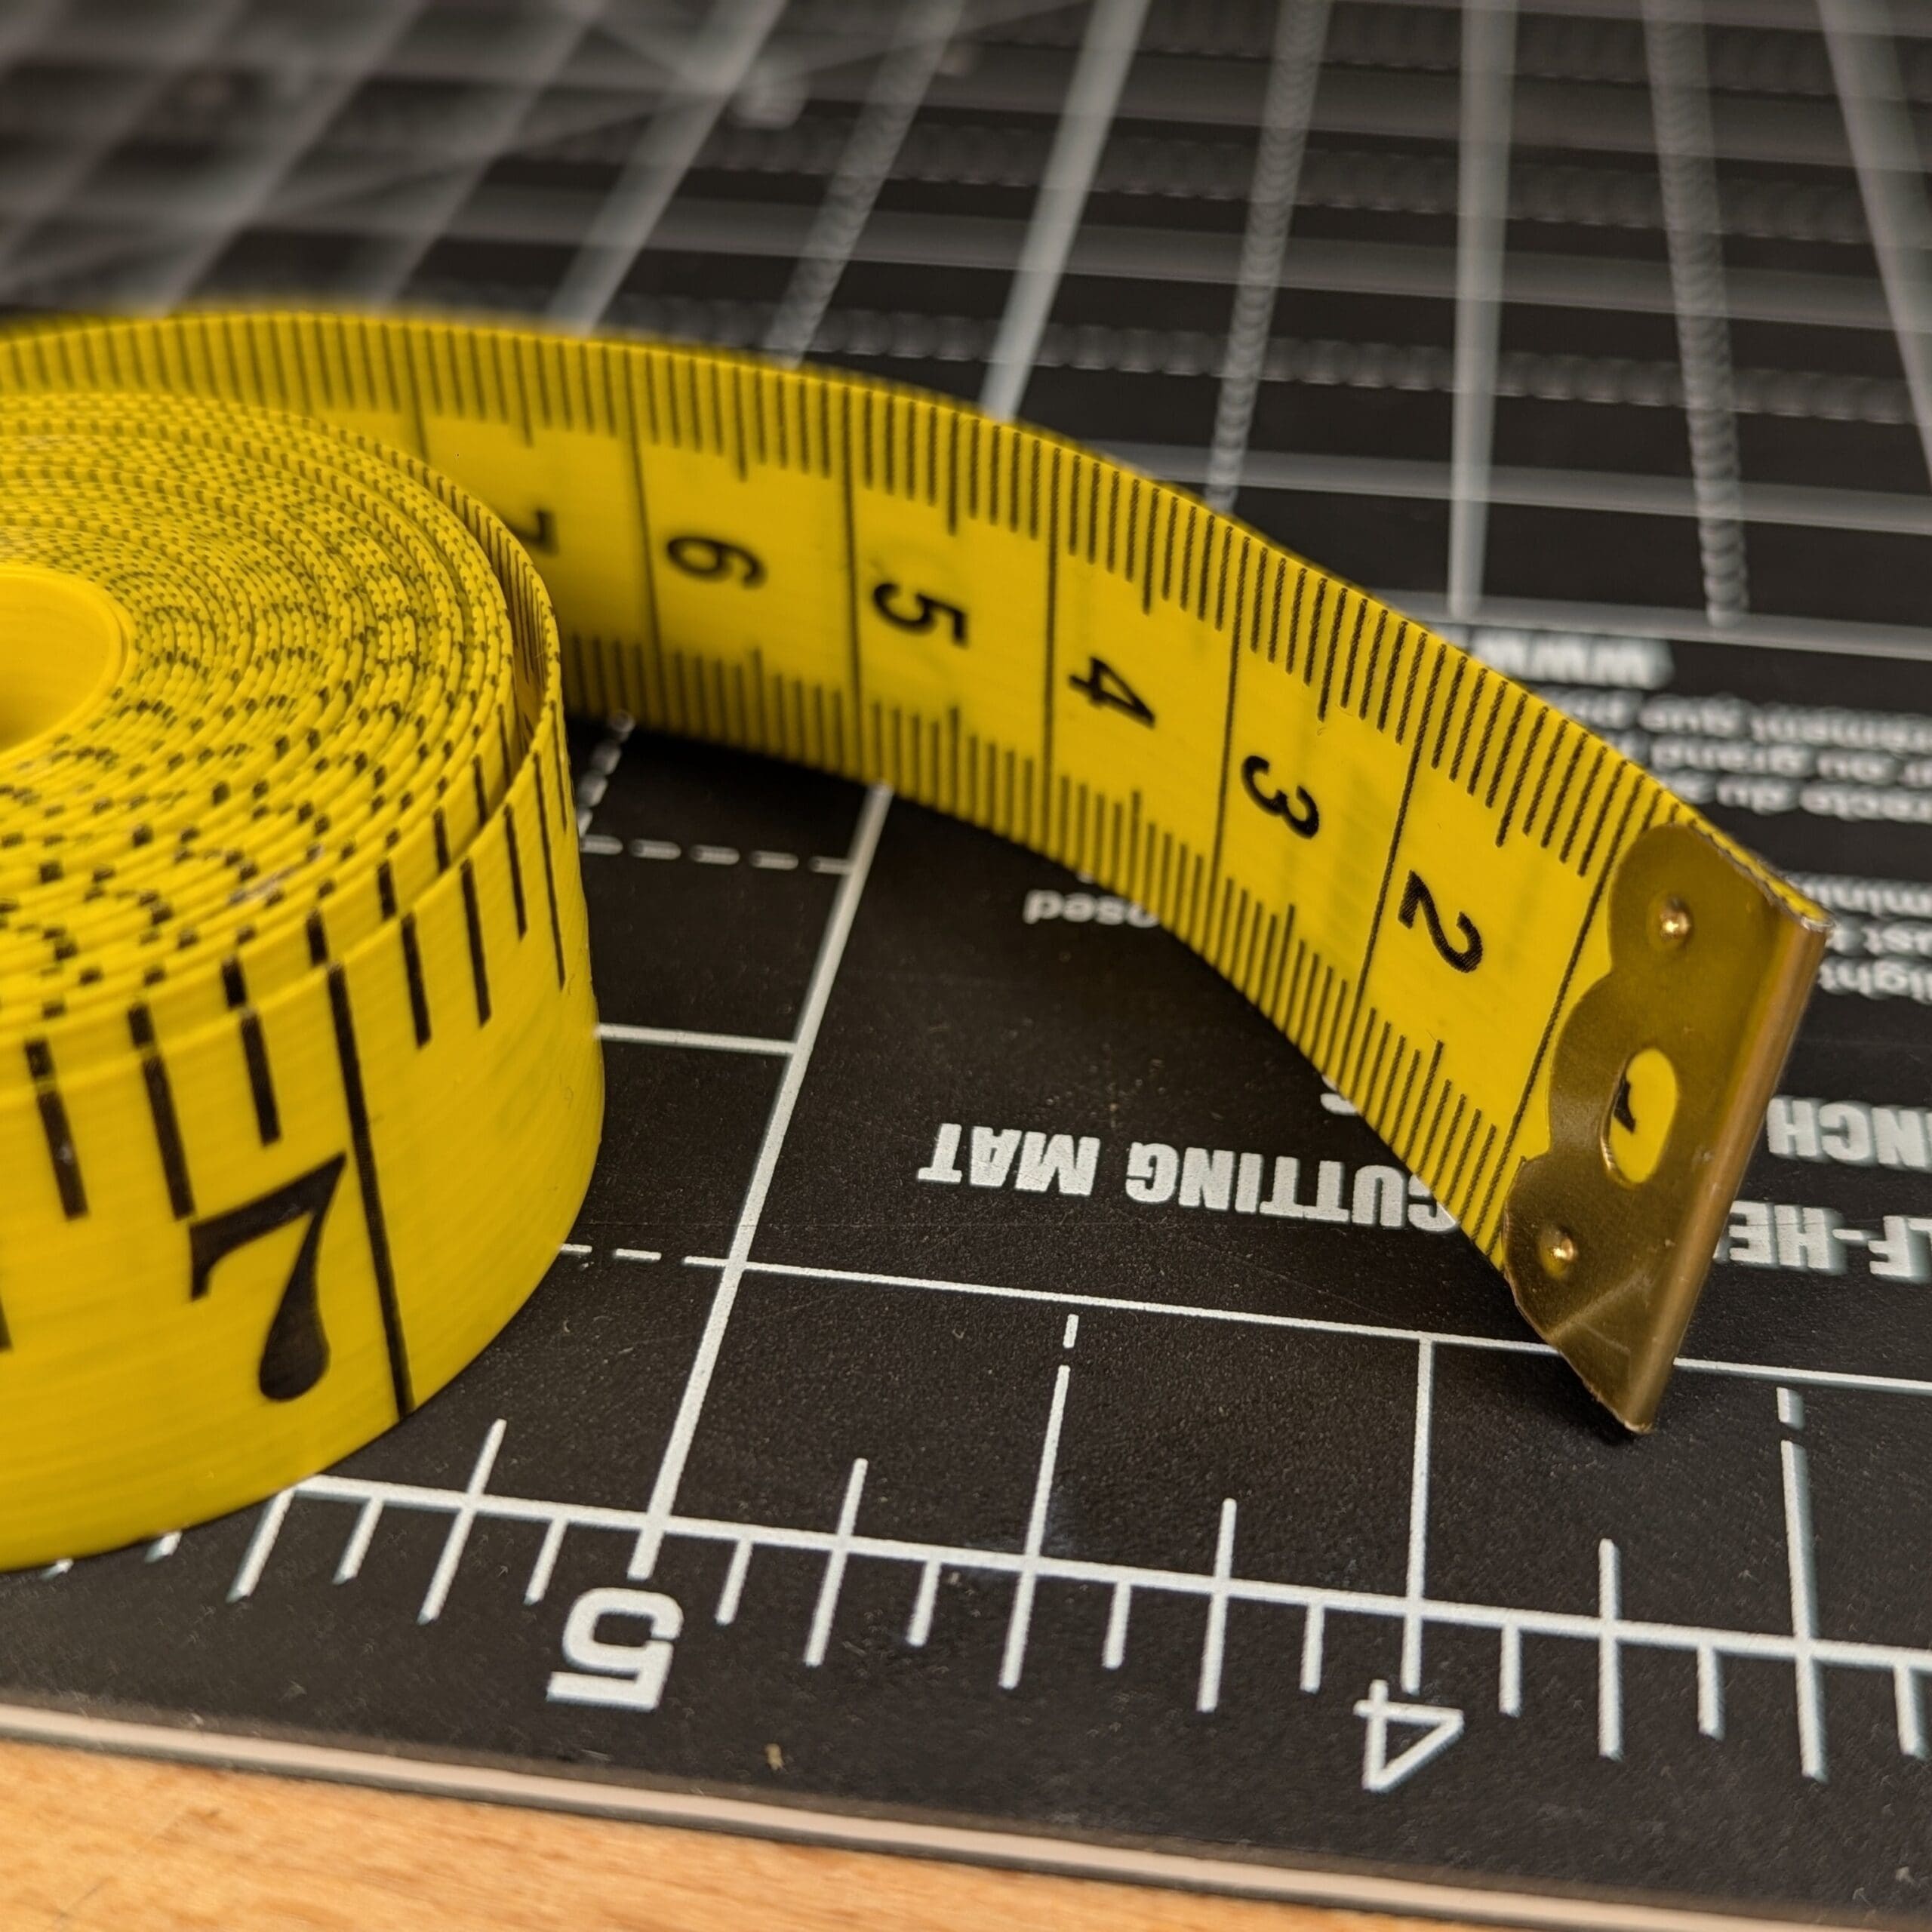
- A clothing (flexible) measuring tape
- A few small pieces of tape to secure your measuring tape for trying out sizes
- A pen and paper to note down your measurements
If you’d like our 19mm cuffs to feel super snug but not too restrictive on your underlying skin, we recommend our measuring tool. We don’t recommend using it for collars for safety reasons.
When we make your cuffs or collar, we’ll add the extra strap length needed so it overlaps in the locking clasp, so you don’t need to worry about that when measuring – we make your restraints to fit around the measurements you give us.
Take your time, and repeat if you’d like to be sure.
If you’re unsure about your measurements, you can contact us anytime to discuss. If you think you messed up a measurement, don’t worry – we don’t cut your restraints to size until just before we’re ready to do the final assembly, so repeating your measurements on a different day might be good for your peace of mind.
Remember, if when you order your restraints you select the option for giving us your measurements later, we’ll not cut your order until you’re certain – there’s no rush, and we want your restraints to be perfect for you.
Once you have your measurements, you can provide them to us by replying to your order confirmation email or by using our online form.
Getting measurements for your cuffs
There’s two ways to measure for your cuffs! If you’d like a fit that’s less than skin-snug, we’d recommend you use the first method listed, which just requires a measuring tape. If you’d like a particularly snug fit, or are worried about getting it right, you can also use our custom measurement tool and follow the second method.
Measuring using a simple tape

Measure your wrist or ankle where you’d like your cuffs to sit.
Keep in mind that your cuffs will usually sit where they’ll fall with gravity, and will be most comfortable “above” (closer to your body, further up your arms or legs) than your wrist or ankle bones.
Noting down the true measurement of your wrist or ankle might be useful for your own reference, or when talking with us about your measurements later if we need to clarify. The true measurement is right where the tape overlaps itself when it’s held gently against your skin.
Example: When we measure our own wrists and get 16.3cm, fitting a cuff to this exact measurement (plus our additional amount for the mechanism) results in a cuff that is comfortably worn, with the clasp resting on the skin, with slight resistance when rotating the cuff around the wrist. The cuff can move several centimetres up and down the wrist.


Add a little extra length and see how it feels.
Think about how you’d like your cuffs to feel when worn, and add length to the loop around your wrist or ankle to see how you like it. You may find it useful to use a small piece of tape to hold it in place while doing this. If you’d like to experiment further, cutting some paper that’s the length you’d like to try and roughly 20mm (0.8 in) wide, and taping it around you is a useful way to test out the feel.
Example: When using the additional length shown here (18cm in total), the cuff is comfortably loose, doesn’t slide over the hand but can move slightly up the hand, and can move along about twice as much of the forearm.
Our wrists are only for us, but we can help with fitting questions if you have any.

Everyone’s body is different, but in general, we find that ankle cuffs should be worn looser (to allow all those tendons and muscles to move about), whereas wrist cuffs can be more snug. Regardless, flex your arms and legs and see if your tape digs in. If it does, we recommend going a little looser.
Keep in mind that your cuffs shouldn’t slip off your limbs! This is very easy to achieve with ankle cuffs, but for wrist cuffs, you may be able to slip out if they’re too loose. To test this, pinch your tape measure at the dimensions you’d like your cuffs to be and see if you can pull it over your wrist and hand. If you can, or nearly can, consider going a bit tighter.
We also recommend making sure both your wrists/ankles are the same size, just in case! If you have a disability or health condition that means your wrists or ankles can swell substantially, we recommend accommodating that in your measurements.
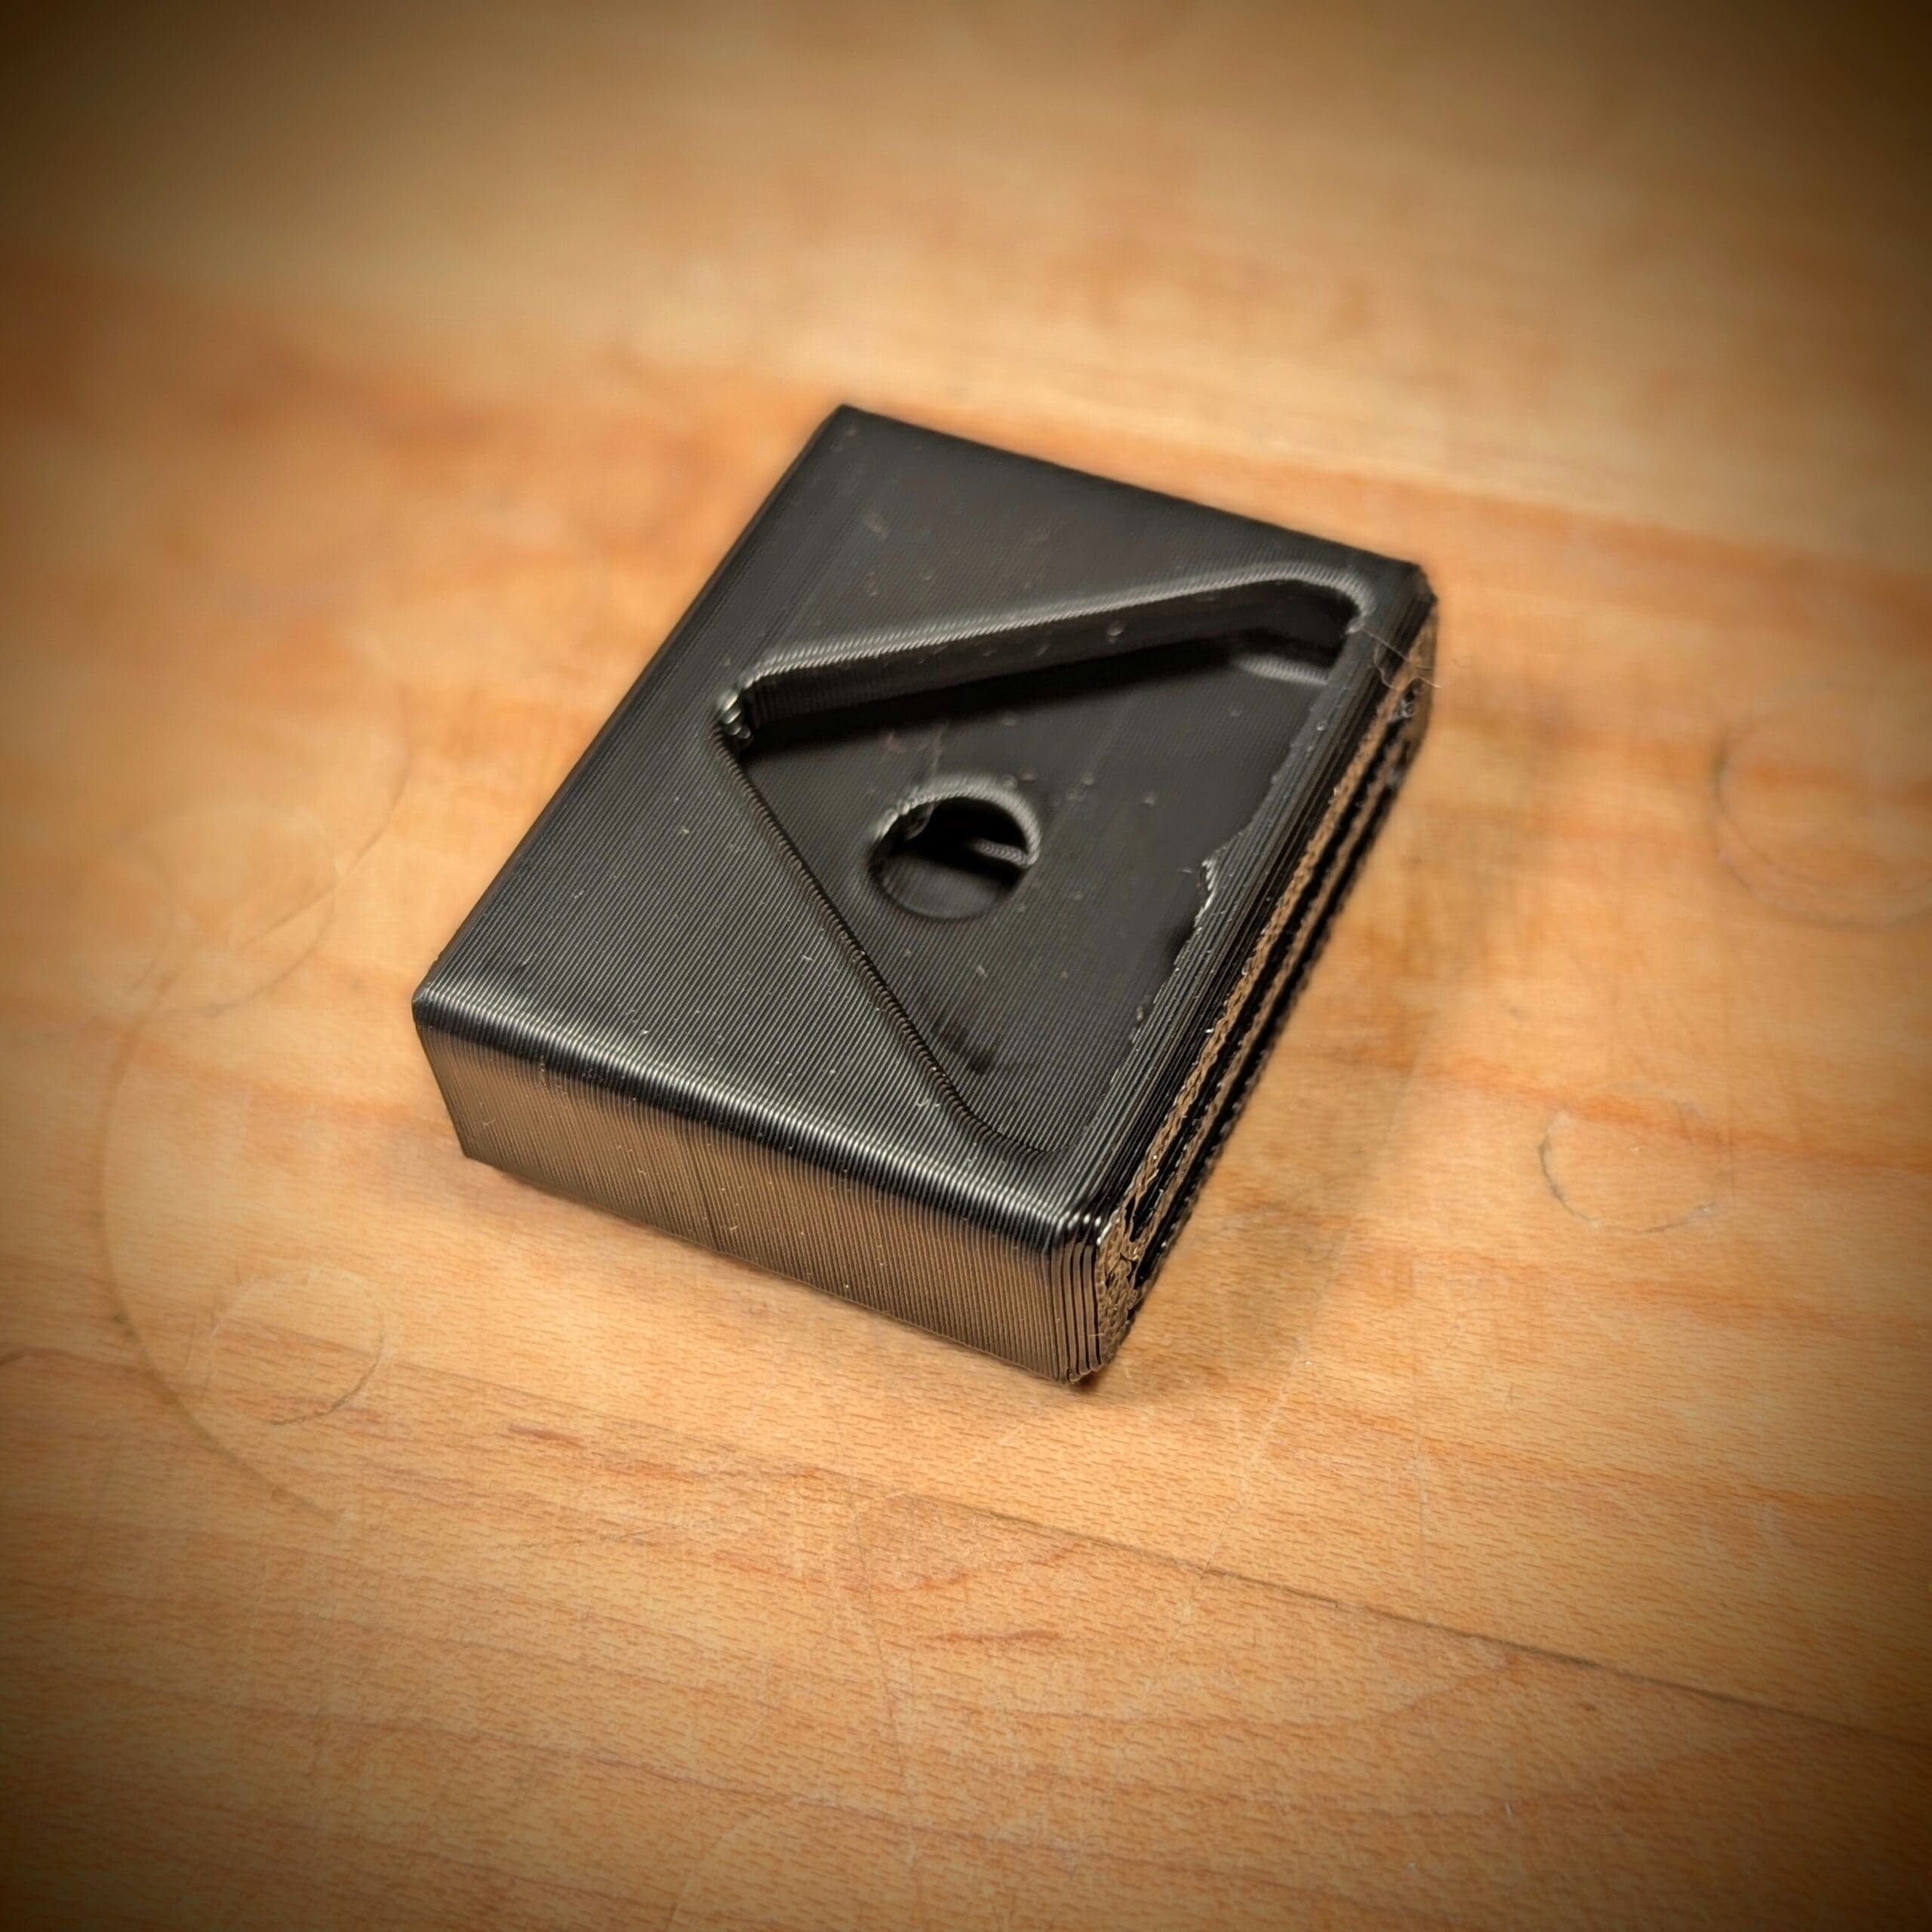
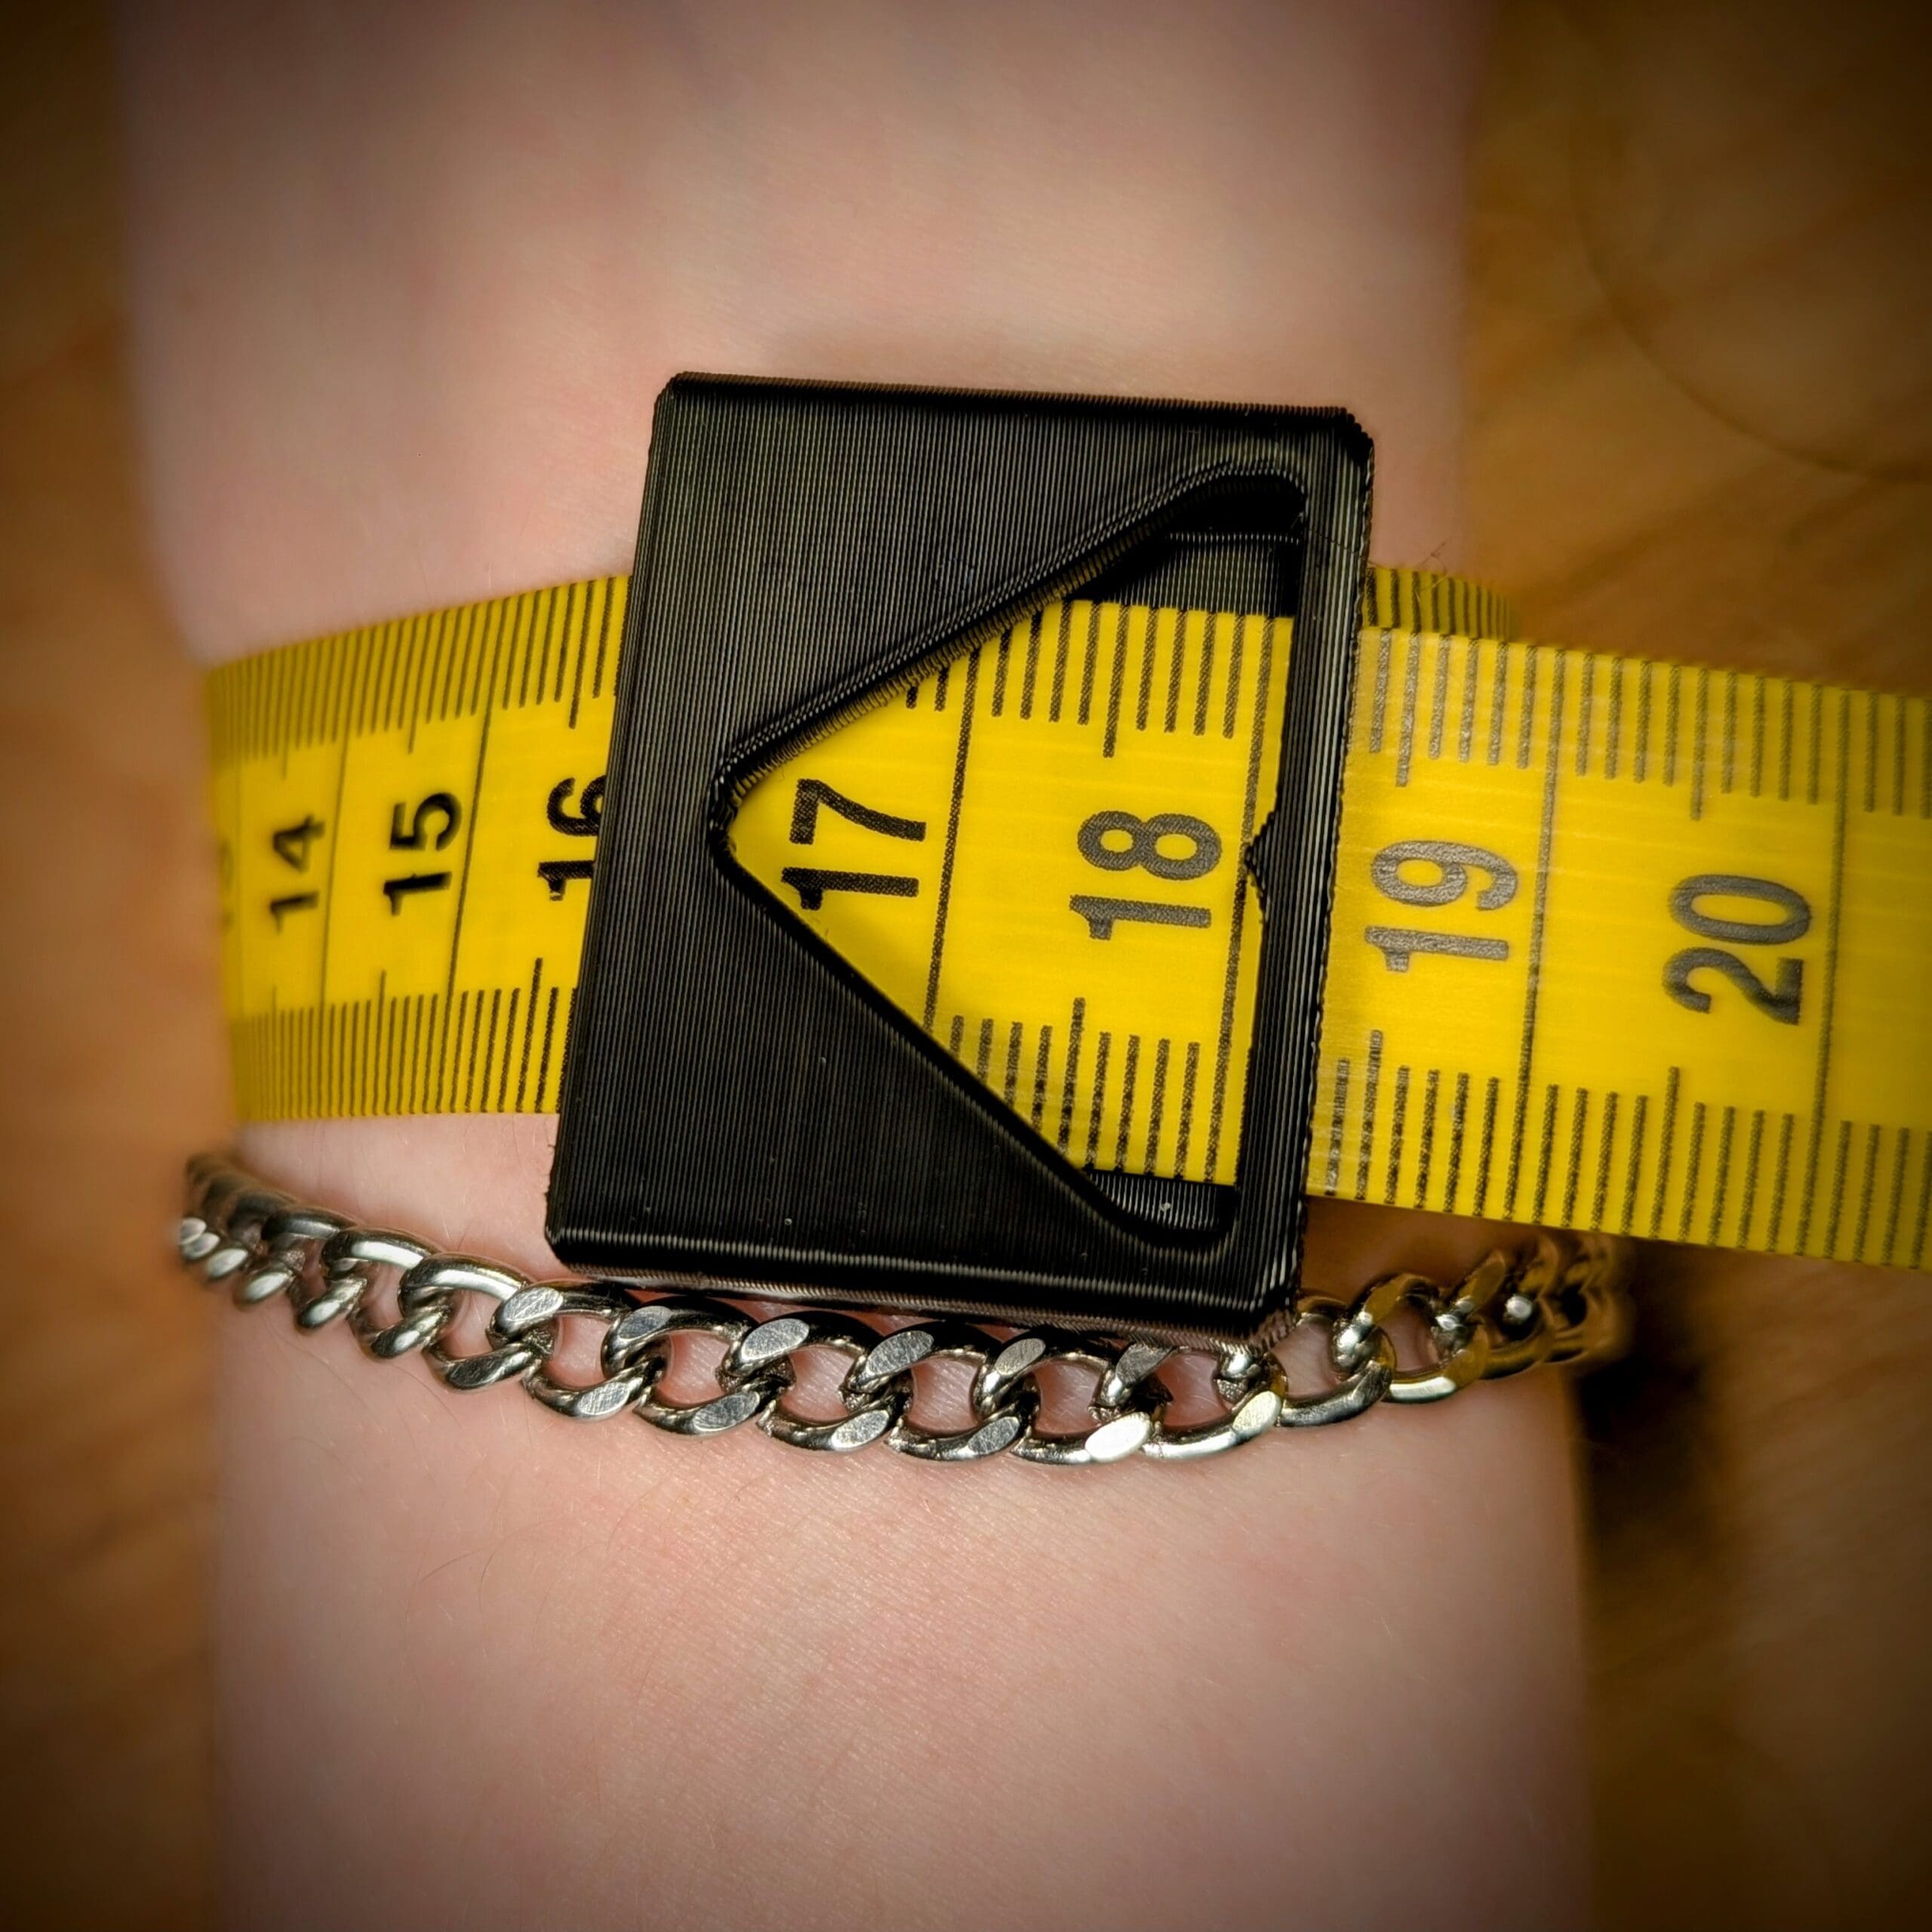
Measuring using our custom measurement tool
Print or purchase a measuring tool before you begin
If you have access to a 3D printer, you can easily print your own measuring tool at home, ask a friend to do it for you or use a 3D printing service in your country to get one quickly. If you don’t have access to these options, you can also purchase one from our shop, which comes ready to go with a suitable measuring tape installed and a coupon code to refund you the cost of your measuring tool from your purchase of cuffs.
Our measuring tool uses the exact same width and depth as the 19mm cuffs, so it should feel extremely close to how your cuffs will feel, but not quite as smooth, glossy and nice.
If you’re printing your own measuring tool, for the best results, print the tool with the triangular measuring window pointing up, with the two open slots on the print bed. For best alignment, if you have a tape measure that’s less than 15mm wide, use the first download option below, otherwise use the second for wider tape measures. You’ll also need a measuring tape (max 15mm or 25mm wide, depending on the model you use) and potentially a few pieces of standard paper.
These measurement tool files are provided for personal use only, and commercial use is prohibited. You may not upload or publish the 3D models we provide to any web service for any reason other than for the purpose of commissioning a 3D printing service to manufacture one or to share the model with other individuals.
Install your measuring tape into the measuring tool
You can skip this step if you’ve purchased a tool from us.
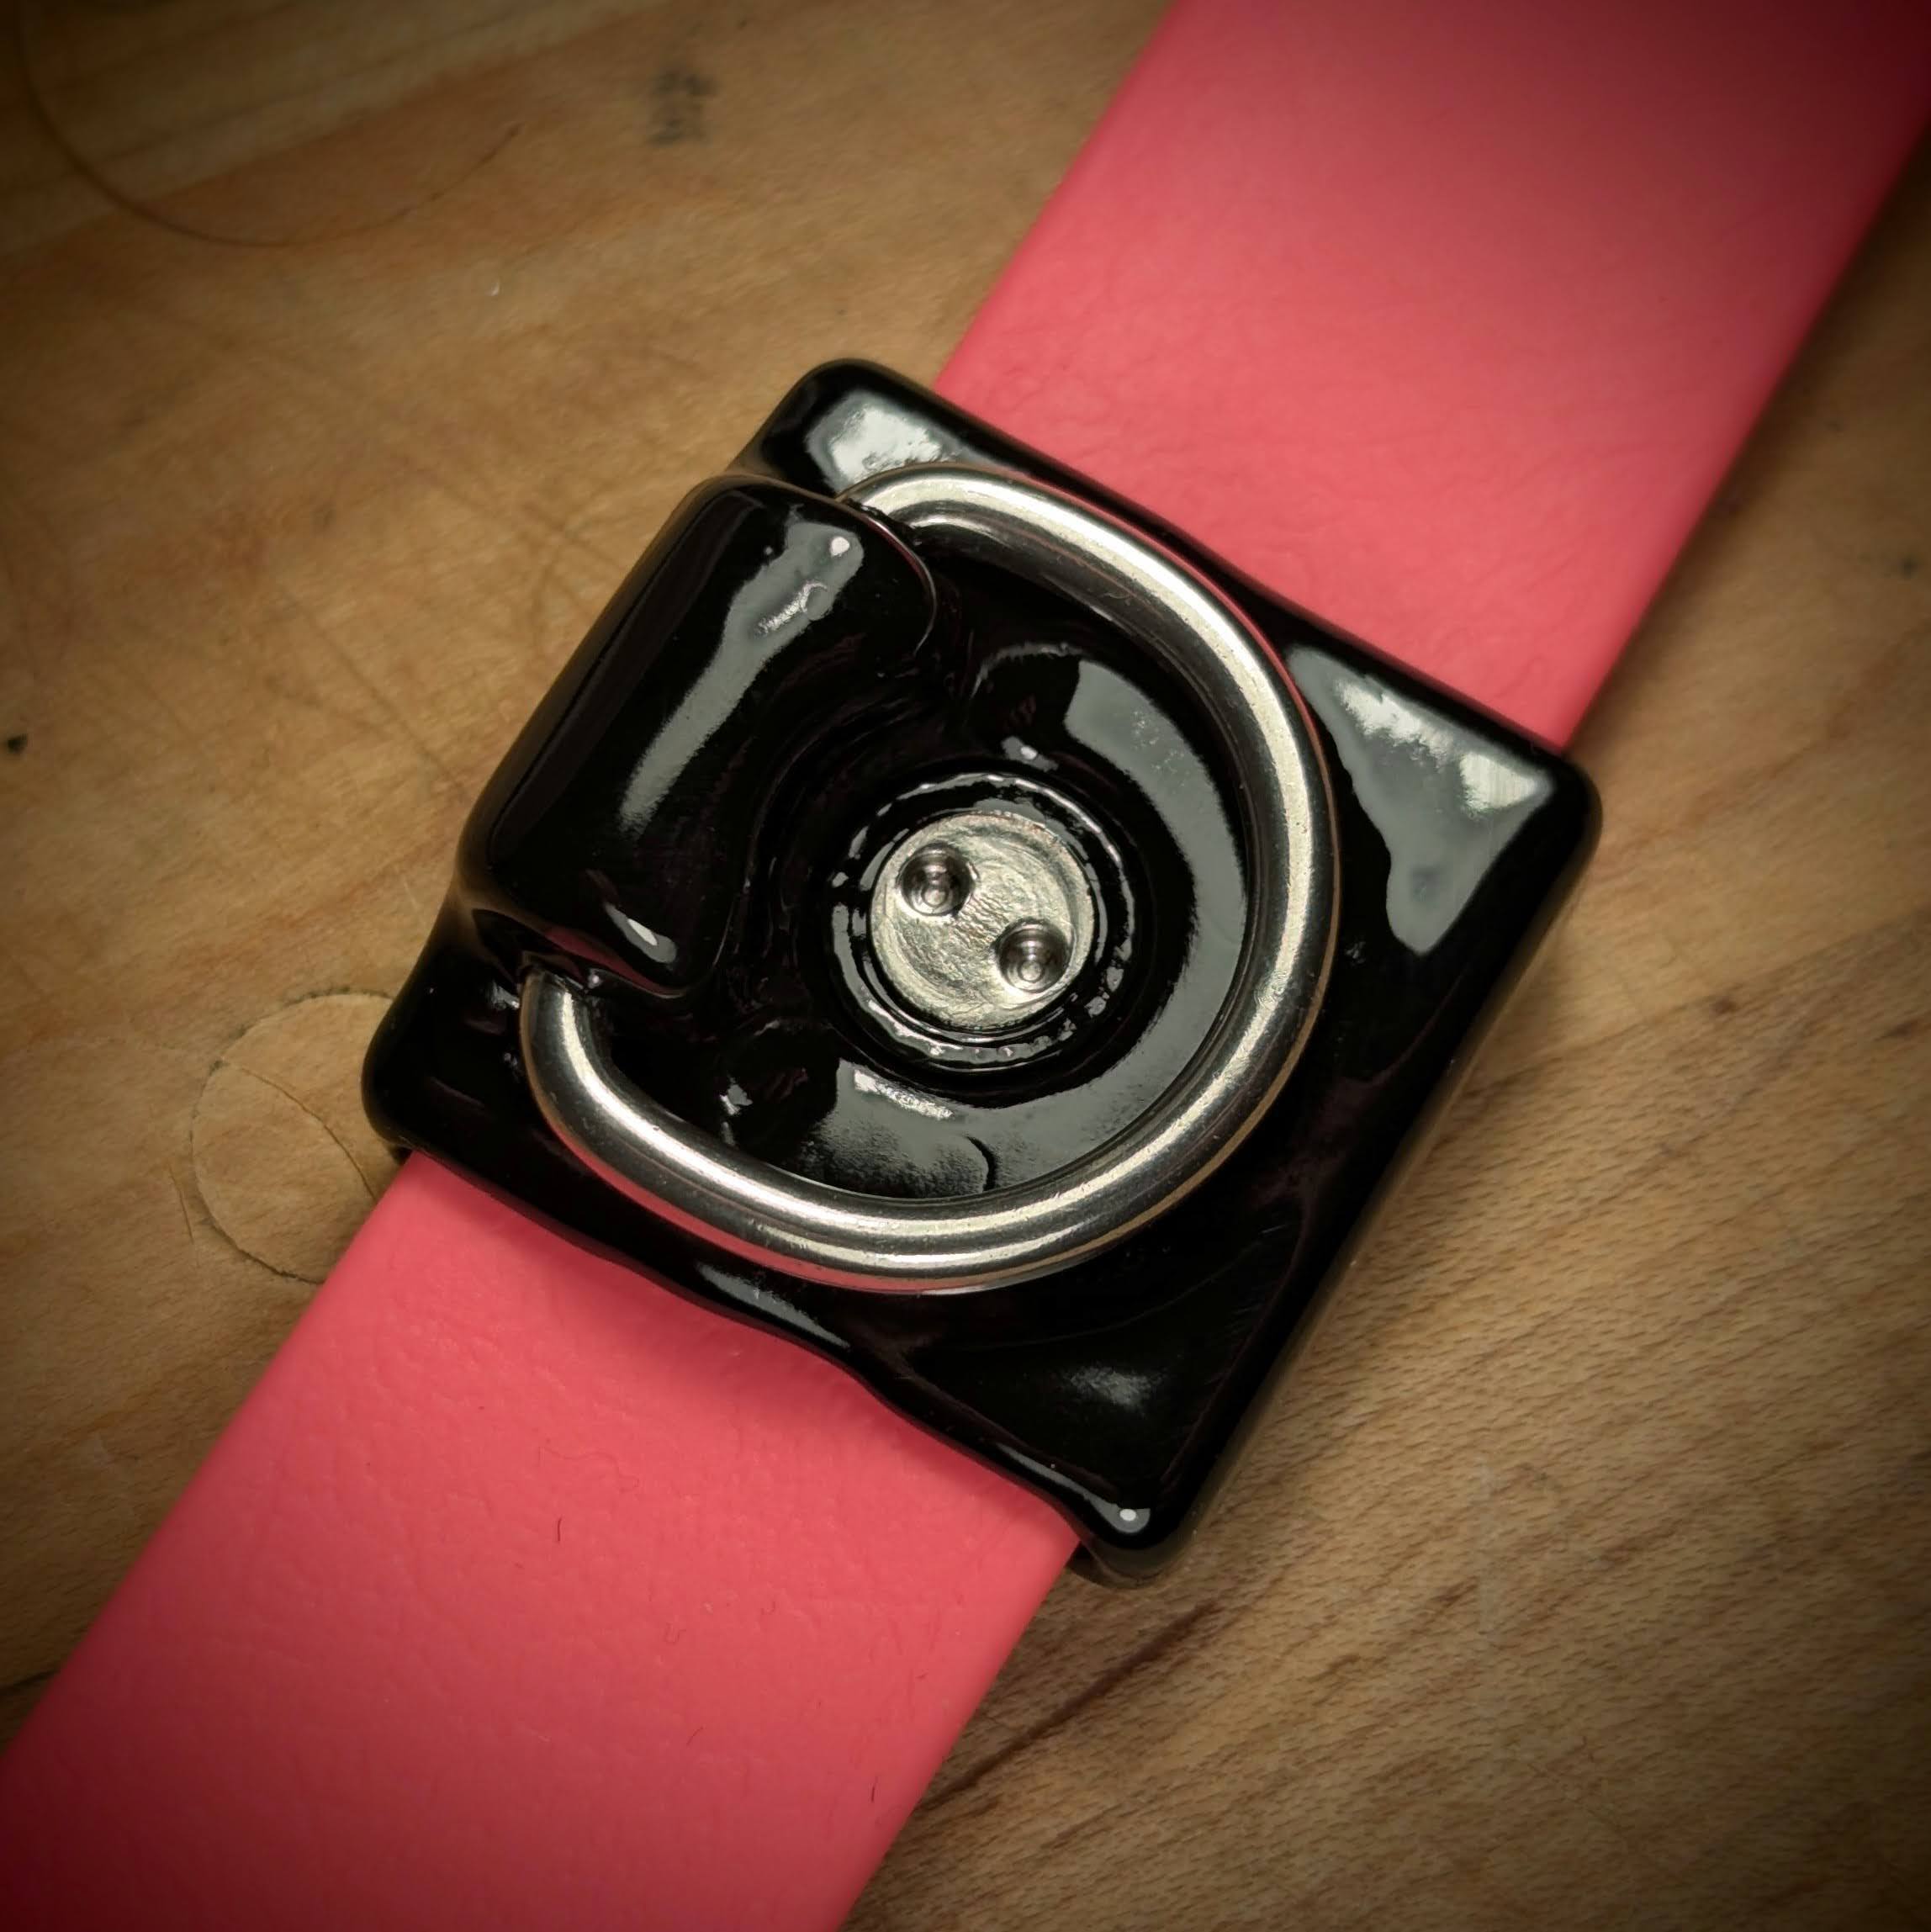
Your measuring tool has two slots for your measuring tape, one at the front that’s open on both sides where you take your measurements, and one at the back that’s closed on one side. Insert your measuring tape into the closed end, ensuring it presses right into the far end and cannot be pushed in any further. If you’re using a tape measure that’s loose in the slot, you can use a few short scraps of printer paper to wedge it in place, or tape to hold it. Make sure it doesn’t budge with light tension.

Put the tool and tape around your limb and insert the other end of your tape
Take your measuring tool and tape and place it on your wrist or ankle where you’d like your cuff to sit. Insert the other end of your measuring tape into the open end of the measuring tool, on the side with the pointy end of the triangular measurement window, opposite the measuring point, ensuring there are no kinks in the loop. Pull it through to wrap around your limb.
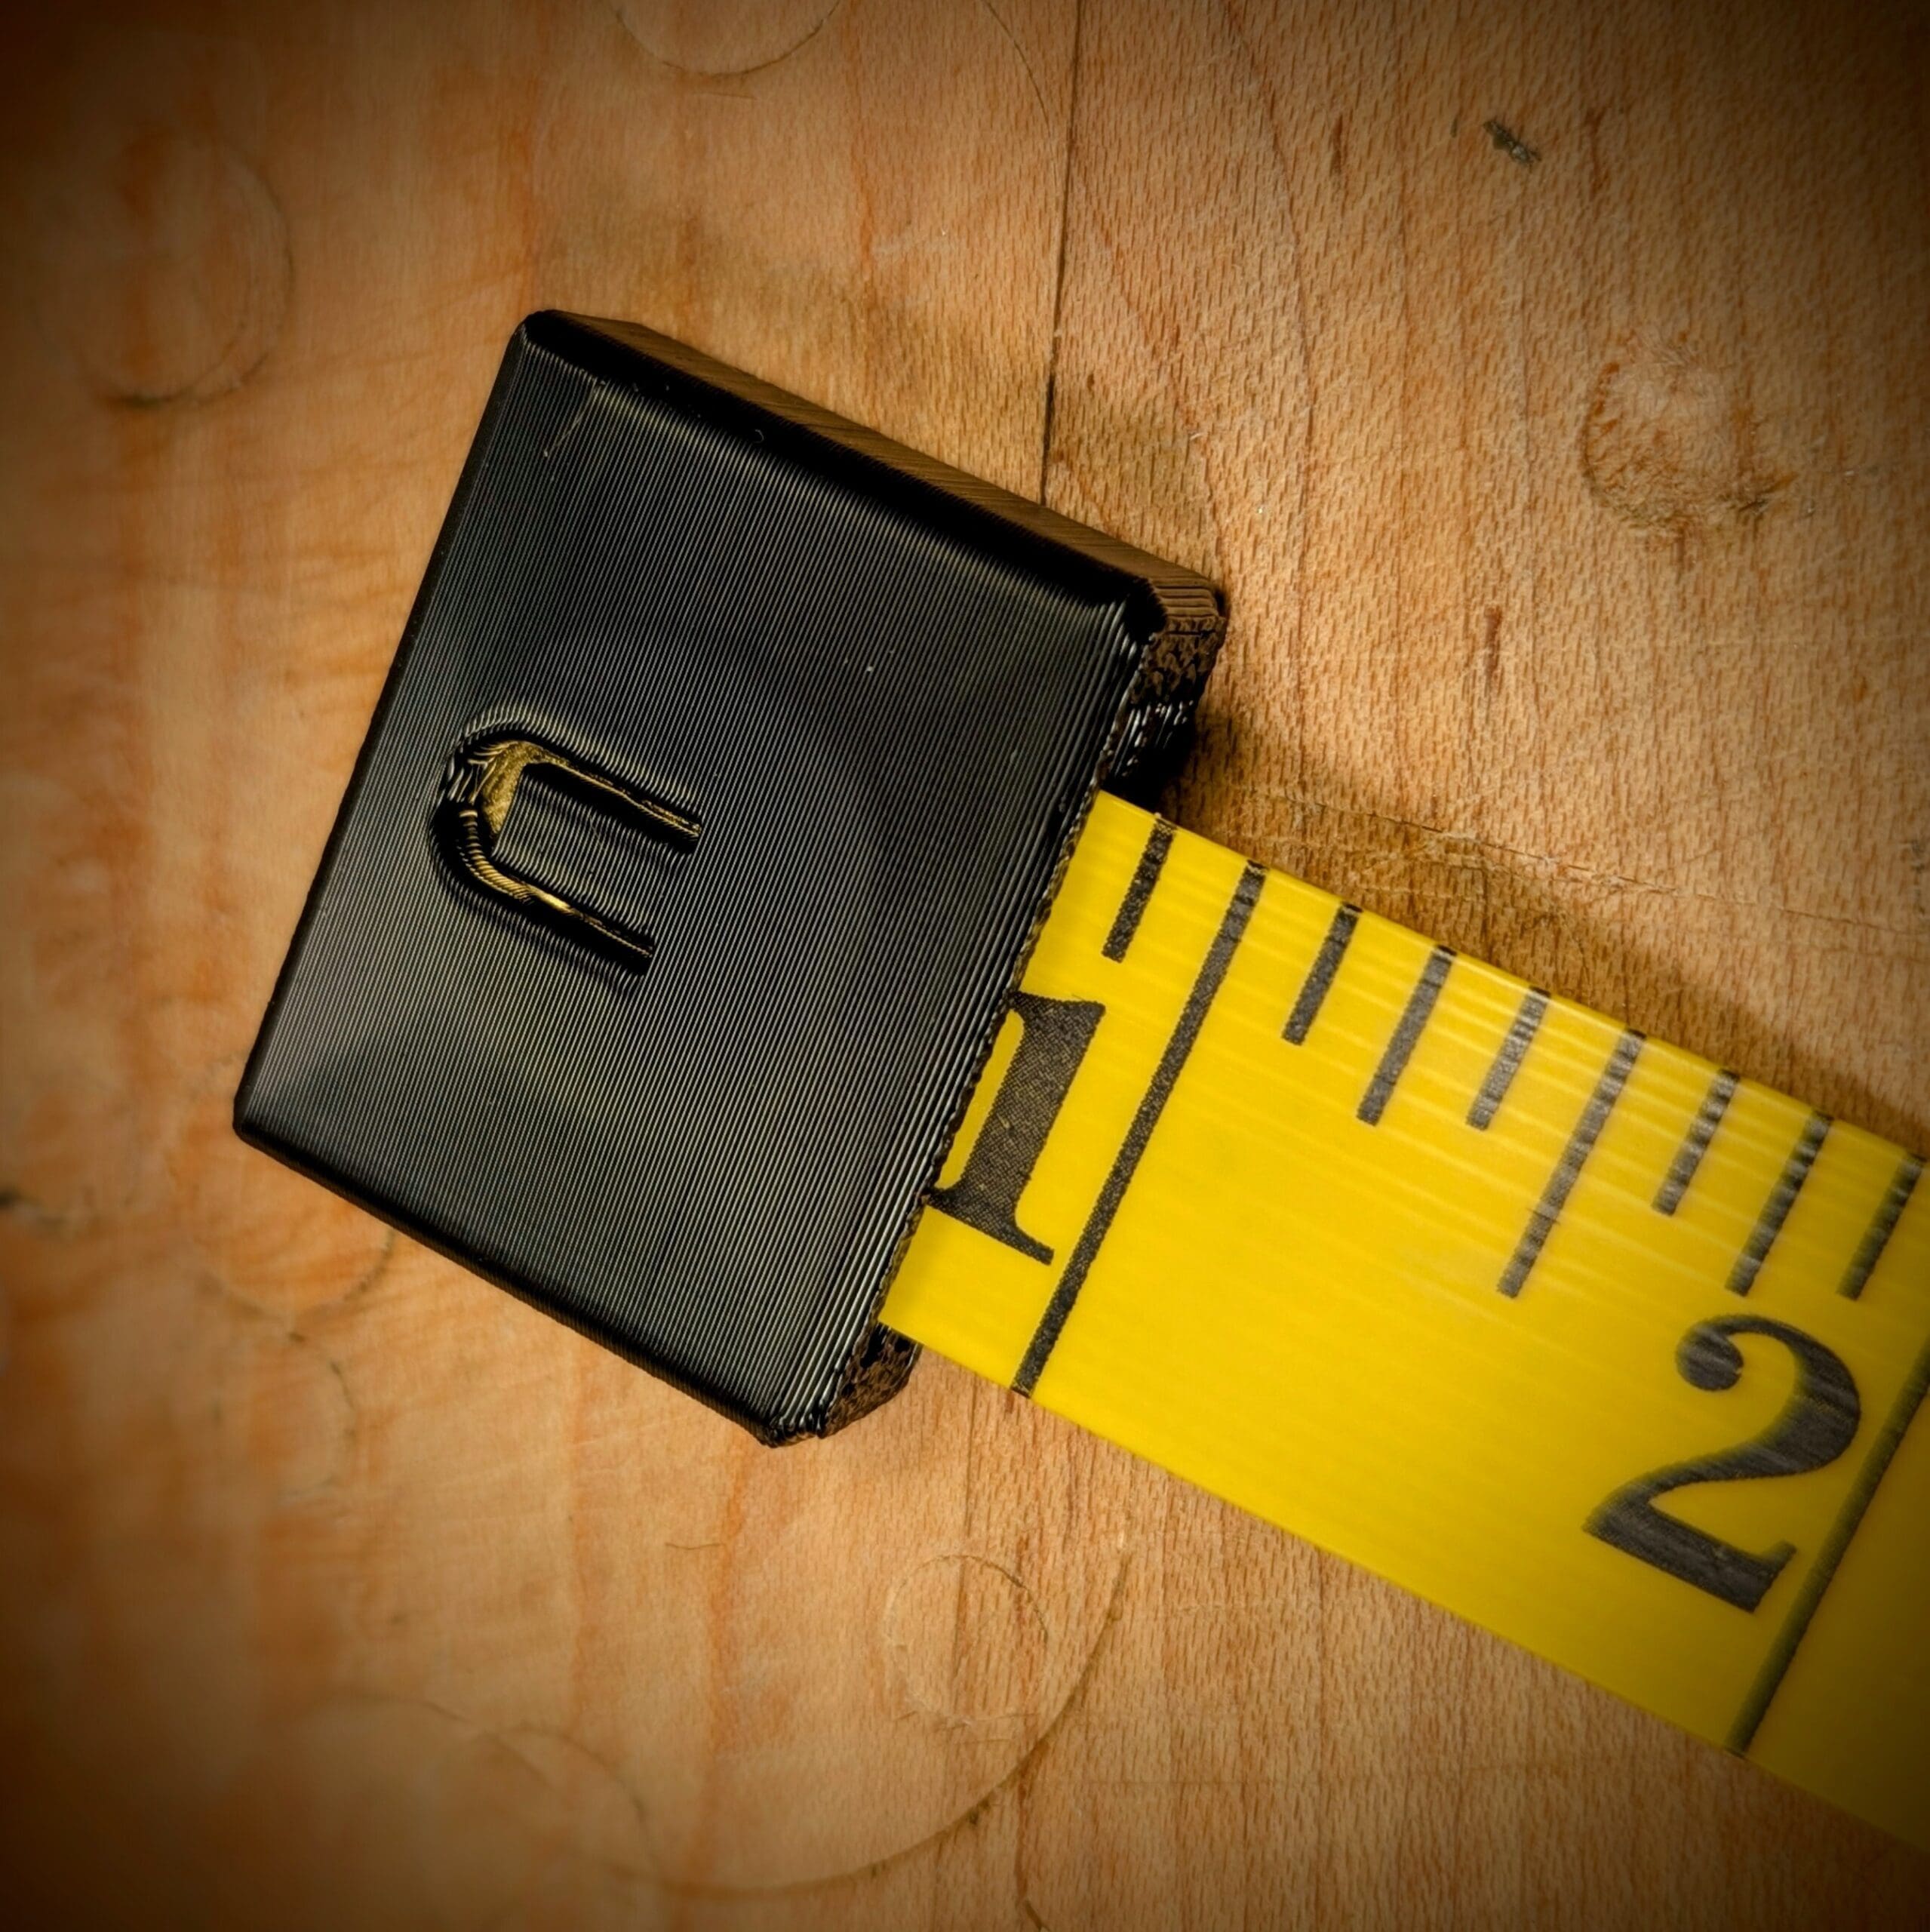
Pull the tape tighter until you get a fit that feels nice
Pull the measuring tape through the measuring tool until you find a fit that feels right. You can use tape to temporarily hold it in place while you experiment, making adjustments as you see fit.
Opposite the pointy end of the triangular measurement window is a small notch, halfway up the measuring tape. This is the measurement you should write down to give to us for making your cuffs. In this example photo, the measurement would be 18.0cm.
Take a note of your measurements
Note down each limb’s measurements carefully. If ordering using our website and giving measurements as you order, make sure you check “Using our custom measuring tool” when selecting how you’re measuring. If you’re providing us your measurements after ordering, make sure to let us know you’ve used the measuring tool.
Getting measurements for your collar
Measure around the base of your neck where you’d like your collar to sit.
Keep in mind that your collar will usually sit assisted by gravity, so unless you want a snug collar that’s against your neck higher up, measuring lower down will give a more relaxed fit.
Noting down the true measurement of your neck might be useful for your own reference, or when talking with us about your measurements later if we need to clarify. The true measurement is right where the tape overlaps itself when it’s held gently against your skin.
Using a mirror is useful for taking this measurement.
Add a little extra length and see how it feels.
Think about how you’d like your collar to feel when worn, and add length to the loop around your neck to see how you like it. You may find it useful to use a small piece of tape to hold it in place while doing this. If you’d like to experiment further, cutting some paper that’s the length you’d like to try and roughly 25mm (1 in) wide, and taping it around you is a useful way to test out the feel.
Due to the complexity of individual preferences on tightness, we recommend you experiment with what feels best before giving us a number.
We recommend not using measurements that result in a restrictively tight collar. If you have a disability or health condition that means your neck or throat can swell substantially, we recommend accommodating that in your measurements.
Getting measurements for your waist belt
Wrap a tape measure around your waist
Using a tape measure, measure your waist using the same positioning you’d use for a normal trousers/pants belt. For most people, it’s OK to add a little tension here, but don’t measure too tightly! The circumference you measure around your waist is the length we’ll make your belt to.
Adjustable and fixed length belts
If you’d like a fixed length belt, we’ll make your order to the measurement you give us. If you’d like an adjustable belt, we’ll make your belt with 20cm of total adjustment, with the measurement you give us as the “middle” option, with the ability to tighten and loosen your belt by 10cm each.
Measuring your crotch strap
If you would like a locking crotch strap, you’ll need a waist belt to wear and your tape measure. To measure the length of your crotch strap, wear your normal belt in the same place you’d like to wear your locking belt, and carefully measure the length between your belt at the centre of your back, through your legs and up to the locking buckle on your belt. If you’re planning to lock anything substantial under your locking belt, consider wearing it while you measure. For flexibility, we recommend getting an adjustable belt if you’d like a locking crotch strap, but we’ll happily make it fixed if you prefer!
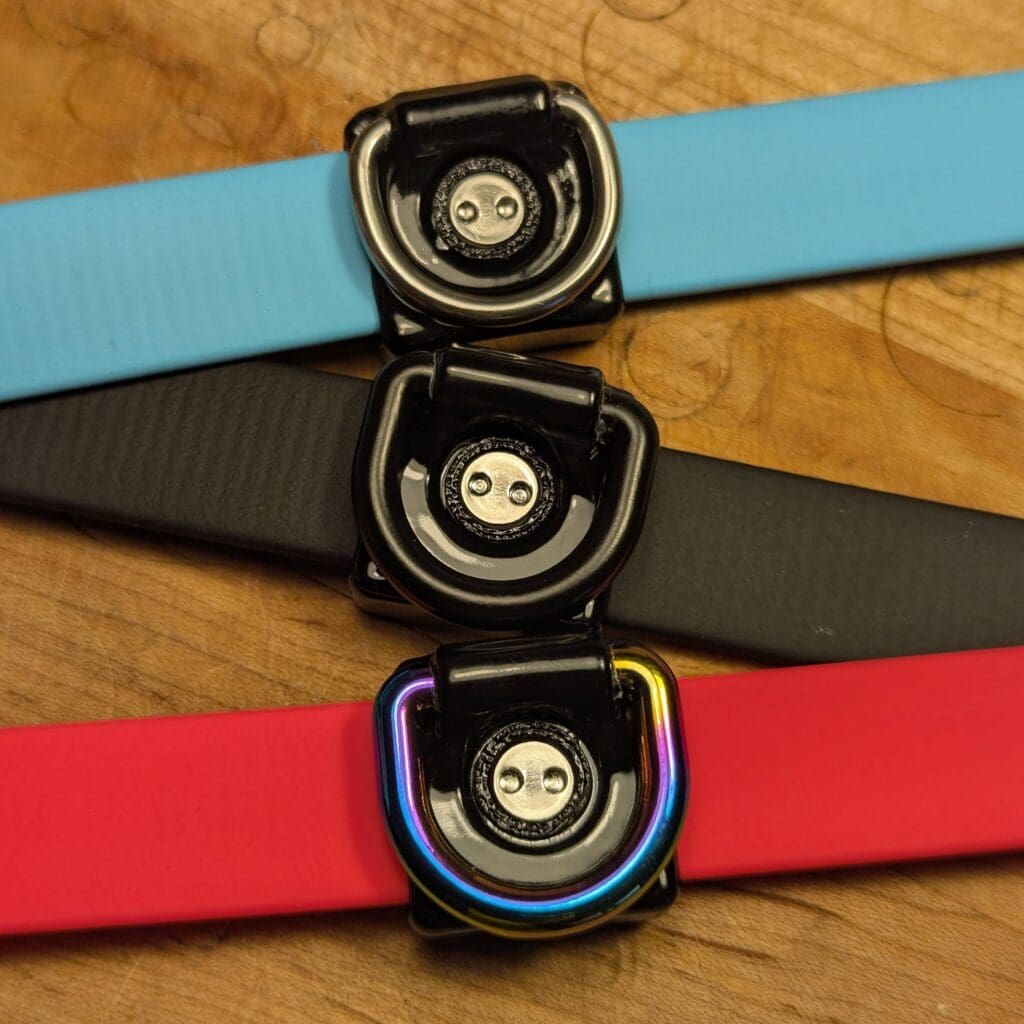
Screw-lock Biothane® cuffs
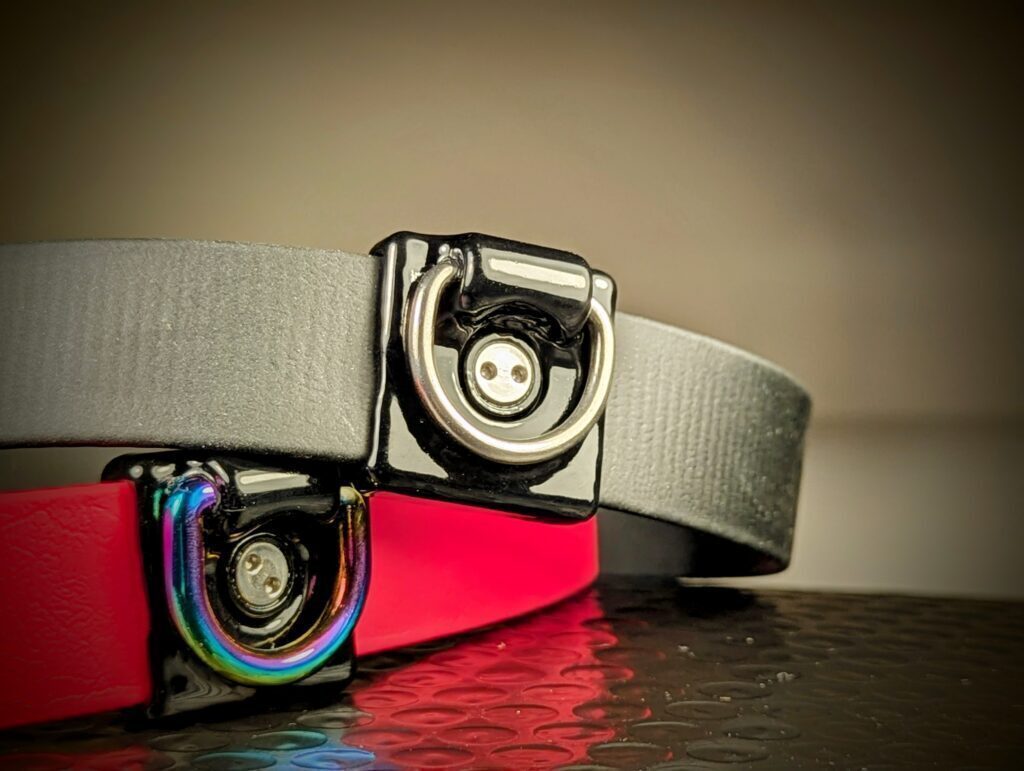
Screw-lock Biothane® collar
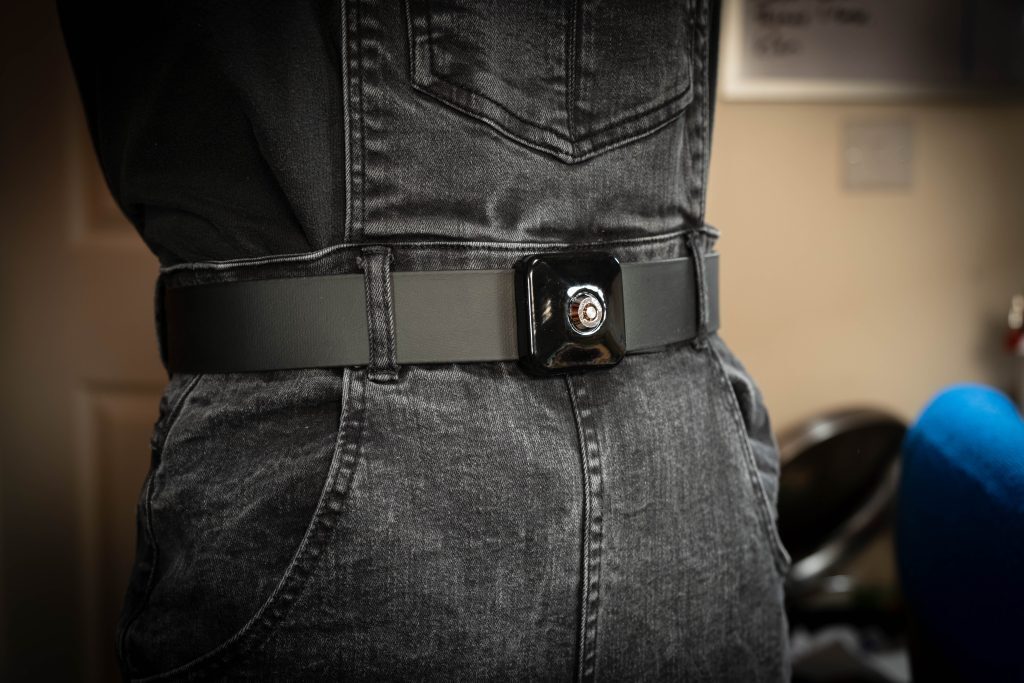
Biothane locking waist belt
Still have questions?
Not to worry! Whether you’ve yet to order your restraints or you’ve recently placed an order, we’d be happy to help.